Mail List Builder

List Types
Our mail list building tool offers four mail list types, described below. A single product on a brand portal site can be used for only one mail list type, but the brand portal can have several similar products to accommodate different mail list types. The product is typically named for the mail list type it is associated with or it is detailed in the product description.
EDDM – Every Door Direct Mail
- Allows reach within a targeted carrier route without knowing specific addresses.
- Mailed items do not have an address on them: the piece is literally dropped in every box on a route.
- See also: Steps to Build EDDM Mail Lists
Saturation
- A collection of potential customer names and addresses within a specific geographic area.
- Cannot select demographics: the mailing goes to every address within the chosen area.
- See also: Steps to Build Saturation Mail Lists
Consumer
- A collection of potential residential customer names and addresses within a specific geographic area with specified consumer demographics.
- See also: Steps to Build Consumer or Business Mail Lists and Selecting Demographics for a Consumer Mail List
Business
- A collection of potential business customer names and addresses within a specific geographic area with specified business demographics.
- See also: Steps to Build Consumer or Business Mail Lists and Selecting Demographics for a Business Mail List
ACCESSING MAIL LIST BUILDER
- The mail list builder is accessed through the product page of a print piece that uses it.
- Take note any listed minimum or maximum limits on the mailing product - these will be enforced within the mail list builder when saving the list you build, and will help determine when you have adequately narrowed your mailing area. Ignore the QTY field: this will auto-populate when the final mail list is created and added to cart.
- For customized products: Select the Customize button for customized products. The template will open in media builder for editing. Make edits and select the Create Mail List button.
- For static products: select the Create Mail List button for static products. This will take you directly into the mail list builder tool.
MAP TOOLS
In the upper right corner of the interface by default is a floating panel tools used to change the view of the map or provide information about map areas.
- These tools are on an overlay that does not affect the mail area being created or edited.

-
Map Screen Controls:
- 1. Map Zoom – zoom in or zoom out to better focus on a specific area. You can also use your touchpad or mouse for these movements (the scroll wheel works really well).
- 2. Locate on Map – enter an address and go directly to that map location. Drops a pin on the map.
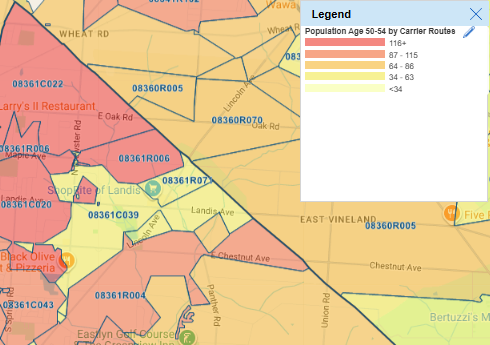
- 3. Legend – identifies what the colors represent on the demographics map
-
Map Overlays:
- 4. Geographies – shows outlines and labels for states, counties, zip codes and carrier routes. Once they're on, you can click inside an area of the map to pop up a display for demographic counts in that area - but you CAN NOT filter by this info in the overlay. It's merely informational to aid in making route decisions.
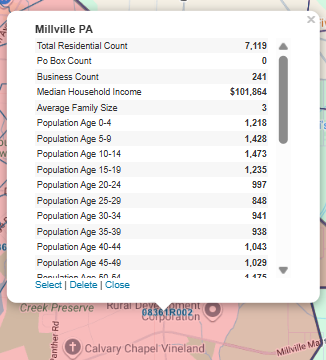
- 5. Demographics – displays a heat map of desired characteristics for a chosen demographic by carrier route or zip code. You CAN NOT filter by this info in the overlay. It's merely informational to aid in making route decisions.
- To remove this heatmap, clear the filter as shown below in "Clearing the Tools."
- 4. Geographies – shows outlines and labels for states, counties, zip codes and carrier routes. Once they're on, you can click inside an area of the map to pop up a display for demographic counts in that area - but you CAN NOT filter by this info in the overlay. It's merely informational to aid in making route decisions.
-
Tools:
- 6. Tools – allows clearing of some tools from the map
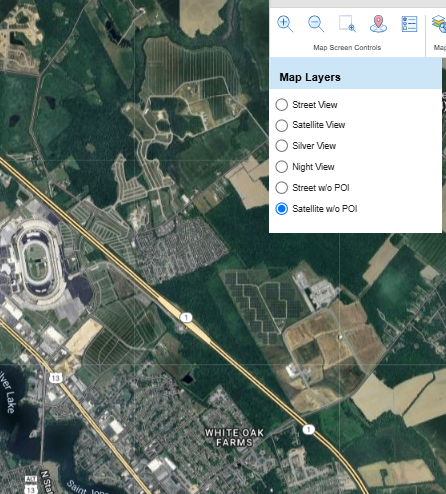
- 7. Map Layers – changes how the map displays the surface. Also, you can turn on/off the map's "points of interest" markers.
CLEARING THE TOOLS
To get rid of the overlay level tools and labels once you've turned them on - click on the tool again, and clear the tool. (The X closes the popup window but does not clear the tool.)
![]()
BUILDING A MAIL AREA
- When first entering the mail list builder you are presented with a map. You may create a new map or reuse one you previously created.
- The Coverage Area dropdown allows choices in how to view the area on the map. NOTE: When sent through in the end, all view options define carrier routes and result in the same final list. For detailed use information, see Creating a Mail Area

- Saving the Mail Area
- Mail areas can be saved as you are editing. Once a Mail Area is saved it will be available for use in your account any time you return to the mail list builder tool.
- NOTE: Each time you save a named mail area it is overwritten with recent changes – you must rename it to preserve an old list.
- To save a mail area, select the Save Territory button.
DEMOGRAPHICS
Consumer and Business mail lists can be filtered by demographics and statistical information.
- For more information, see: Selecting Demographics for a Consumer Mail List and Selecting Demographics for a Business Mail List